

What is Melt & Pour Soap? We find the easiest way to explain Melt & Pour Soap is to liken it to “Pears" transparent soap or the soap that the “Body Shop” and “Lush” sell. Melt & Pour Soap is pre-made “glycerin” soap base that is easily melted, coloured, scented, and poured into moulds for fun and creative soaps.
Melt & Pour Soap Bases are ready to use right away; no curing required. They are very gentle on fragrance and essential oils, and you can safely add embeds, botanicals, exfoliants and additives as you wish. Melt & Pour Soap is a great way to get started in soaping; it's easy to use, and perfect for developing technique and gaining confidence before stepping up to Cold Process Soap Making.

What can be added to your hand crafted soaps? Loads of things, many of which you may find in your kitchen pantry! Liquid honey, oatmeal, cornmeal or polenta, coconut milk powder (or buttermilk powder), cocoa powder, various dried herbs, dried flower petals, dried orange peel, poppy seeds and more. You’ll find a lot more ingredients to add to Melt & Pour Soap on our website too - including loofah, loofah slices, ground pumice stone, mica, glitters, exfoliants, powders and more!
With Melt & Pour Soap you can:
- Easily make wonderful looking soap – using any mould you like
- Embed toys (not for children under 4 years) for a fun gift or decorative soap bar
- Embed other Melt and Pour Soap pieces and/or cured Cold Process Soap pieces for contrast and design
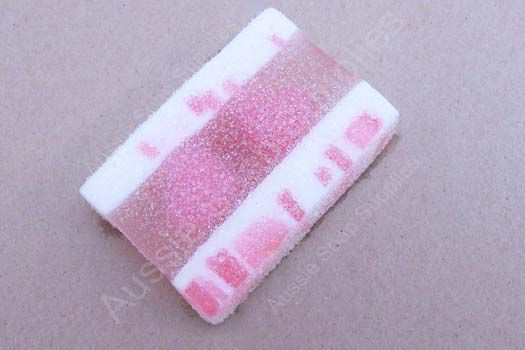
- Layer colours and types of Melt & Pour soap
- Pour it, roll it, plait it and fold it
- Mix amazing colours and fragrances
- Make works of art
What you can achieve with this wonderful soap is only limited by your imagination, and if you feel you may be lacking inspiration, have a look at the rest of our Recipe Formulary.
* SAFETY * Always ensure children are supervised, especially with cutting and using hot soap
Our Range of Melt & Pour Soap Bases
Aussie Soap Supplies® stocks Melt and Pour Soap Bases sourced from Stephenson Personal Care and SFIC, as well as an exclusive range of custom Palm Free bases, free from palm oil derivatives. Our bases feature a variety of specialty ingredients, such as milks, luxury oils, butters, exfoliants and plant proteins, all added during manufacture.
There are many types of Melt & Pour Soap Bases around – all our bases are manufactured to INCLUDE their special additives, and are not low quality bases that have been melted down and have some “butter” or “aloe” etc added. By purchasing professional speciality bases, the lather and composition is not compromised, and as they have not been overheated there will be less sweating to worry about. None of our soap bases have ever been tested on animals.
BROWSE OUR RANGE OF MELT & POUR SOAP BASES HERE
How to Melt the Soap
To melt the soap base you can use a microwave, double boiler, Bain Marie or LOW direct heat source (if using a cook top keep it VERY VERY LOW). Simply slice some soap base into small chunks, similar to diced potatoes, and gently heat until you reach the point where there is just one or two small pieces unmelted. If using a microwave, always have the setting on “low” or “medium low”. Remove from the heat and then gently stir to melt these last little pieces. If heating large quantities of soap (approx 500g or more), we recommend covering the heating vessel with a lid to avoid evaporation from the soap. Once melted, add colour, then fragrance, and stir to combine well and pour!

Moulds
Where to start? With a kit you have a range of suitable moulds, but many other items can be used as a mould too! Just about anything that can hold the hot soap is suitable, (but its best to steer clear of metal as it is more difficult to unmould and can cause problems as it wears). Sturdy but flexible is best! We sell over 130 different mould designs, both for Melt & Pour Soap and for Cold Process soap. You can also re-use jelly cups, yoghurt pots, some cake packaging, chocolate moulds, all soap moulds including log, tray and divider moulds. The main requirement is that the plastic does not collapse with sustained heat as the hot soap is going to sit in the container until cold, and this may take a little while depending on the capacity of the mould.

Unmoulding
Firstly, ensure your soap is COLD – this means completely set at room temperature. If you are trying to take still warm soap from a mould, you will run into problems. Make sure the soap has set completely, and the temperature and hardness are the surest guides. Virtually all our moulds are now flexible silicone, so you simply pull the edges away from the set soap, invert the mould and slide your thumbs across the base and the soap eases out onto the bench. If they are the thinner style, you can simply peel the mould away from the set soap and voila!
If you have been gifted some of our older, more rigid plastic style moulds it can be a little trickier. The best way to remove Melt & Pour Soap from these moulds is to take a fairly thin, flexible spatula and simply run this around the inside of the mould walls - this allows some air to be introduced between the wall of the mould and the soap. Then turn the mould upside down and run your thumbs from the outside of the mould towards the centre, exerting gentle, but firm pressure. The soap will simply pop out onto the bench, if proving a little stubborn; a gentle tap on the workbench will usually do the trick.
If you experience any problems, half an hour in the refrigerator will help, but this isn’t recommended as a routine way of setting your soap. If you were in a hurry, and chilled the soap, allow the mould to return to room temperature before attempting to unmould – this avoids damage to the mould. Using the fridge and freezer does encourage sweating and may cause layers to separate.
Note: If you try and release the soap from the moulds by force you will damage and possibly crack plastic moulds. Plastic moulds are not designed to withstand this sort of treatment.

Colouring the Soap
Together with fragrance, colouring is the most enjoyable aspect of soaping! To admire and smell your own wonderful soap is such a treat.
There are two basic types of colours you will wish to use – dyes and pigments. The main thing to remember is that dyes will bleed and pigments won’t bleed. By “bleeding” we mean that if you were to pour a white or clear layer of soap next to a bright blue layer (for instance) within a short period of time, you will find a halo of pale blue colour where the two colours meet. The depth of this colour will get stronger and stronger as time goes on. This is known as migration of colour or “bleeding”. Pigments won’t do this, as they do not “move”. Please check the website carefully when purchasing colours to ensure you choose the right colour for the right application.
Liquid colourants are best for Melt & Pour Soap, as this avoids the speckling and spotting dry dyes and pigments will cause. However, if using micas (these are the sparkly colours you find in eye shadows and lipsticks), they are usually in powder form so you will need to work with them and ensure they are properly dispersed to enjoy their stunning effects. (You will need to use CLEAR soap to see these sparkly effects). Add micas when the soap is still quite liquid and ensure the particles are all “wet” and evenly dispersed.
Once the base has melted, it is ready to have the colour added. Add it cautiously! Add it a few drops at a time – if it is too pale, you can always add more, it is much harder to correct too much colour! All our colours are very concentrated, so one drop goes a long way. Stir this in gently, as with all additives and fragrances. Over zealous stirring will create bubbles – if this occurs in your soap, simply spritz with a little Isopropyl Alcohol or surgical spirit and the bubbles will instantaneously disappear.
Clays can also be added as a natural colourant and detoxifying agent but don’t over do it or the soap will be drying. Moisten clays in a little water, alcohol or glycerine to enable them to be mixed into the soap without clumping.
Dyes and pigments can stain surfaces and clothing – so protect your clothing and/or work surfaces.

Fragrance & Essential Oils
Both fragrance and essential oils can be used successfully in Melt & Pour Soap. The only restrictions with fragrance usage is that you ensure they are cosmetic quality, and not manufactured for oil burners or candles. Some candle fragrances are skin safe, but others can create severe allergic reactions on your skin (we only carry skin safe fragrance oils). Check with our website (or any other supplier) to see if they will discolour soap. It is easy and can be creative working with discolouring fragrances, and the exquisite fragrance far outweighs the discolouration in most cases. As a general rule, all vanilla and foody based fragrances will discolour the soap. To avoid this occurring, you will need to use some Vanilla Colour Stabiliser. To use this, gently warm (if solid) and add the same amount of stabiliser as fragrance. Note: this ingredient sometimes has a distinct odour, so don’t sniff this bottle – just add to the soap and stir through.
When using essential oils ensure you follow Essential Oil Safety Guidelines – the most important thing is not to exceed 2.5% essential oils in your soap and to check for contra-indications. Always spot test first and read up on the essential oil for any contraindications.
We usually prefer to work with fragrance in Melt & Pour Soap, (but this is personal preference only) however essential oils work well too. In Melt & Pour Soap you can let your imagination and nose run wild! Usually 10 - 15ml of fragrance per kilo is sufficient, but like essential oils, fragrances vary in intensity, so let your nose be the judge. Don’t be frightened to blend or mix essential oils and fragrance, or even different fragrances together to get a blend YOU like.
20 drops = 1 ml (ie 25 drops in 50mls of carrier oil/soap)
…..so in
100g/100mls of soap use 50 drops
50g/50mls of soap use 25 drops
These are maximums for essential oil safety – please go slowly and test as you go along for the best results. If irritation occurs, discontinue use immediately.
Ensure you stir the essential oils and fragrance oils in well or you will find they sit on the top of the soap. Don’t panic though! When making small batches or individual soaps, it is really difficult to over-scent these – we just like you to be safe. Just using your nose gives you a good indication of usage levels
Wrapping your finished soap also helps it to retain its scent a lot longer than those soaps exposed to the air.

What additives and how much should I add?
We often get asked about percentages of additives, luxury butters, and natural oils that can be added to Melt & Pour Soap. We don’t believe any of our soap bases require extra moisturising additives, but as this is a personal preference, don’t let us hold you back! Often, the amount is to suit your personal taste, but with butters and oils there are limits to the amount you can add before affecting the lather of your soap. With our bases, the oils (ie Cocoa Butter, Shea, Olive, Hemp Seed etc) are already in the soap, so this doesn’t arise.
- If adding beeswax, remember this will reduce the clarity and lather
- Alcohol will increase the clarity but too much can be drying on the skin
- Butters and oils can add extra emollience to your bar – but don’t add too much or you’ll cut lather dramatically
- Herbs, spices, and exfoliants add texture to your soaps and are scratchy (or exfoliating)
- Clays should be limited to avoid being too drying
With herbs and spices, remember they are going to exfoliate, as they are particles, so if you do not wish for a scratchy soap, you will need to keep them to an absolute minimum. The larger the particle, the more scratchy your soap will feel. They do not affect lather, just the overall texture. With clays, you will achieve very earthy colour, and these are mainly added to Melt & Pour Soap as a detoxifier for the skin. Glitters are classified as an additive, as they can have an exfoliating effect, and often you can gain major glitz with minimal glitter!

How to include additives
Melt & Pour is such fun to “play” with! Here are a few tips on adding exfoliants and other additives:
-
Make sure the herbs you are adding are dry. Ensure herbs and botanicals are completely dry before adding or your soap will “slime” and then develop mould as the plant material decomposes. By adding dry herbs you will eliminate this.
-
As a general guide, we suggest approximately 1 teaspoon - 1 tablespoon of exfoliant per 500g of soap base. It will depend on the exfoliant and how you like the soap to feel on your skin.
-
When adding dry and powdery additives such as ground nuts, pumice, bamboo powder, oatmeal etc, remove a little hot soap and stir in well to eliminate any dry spots. Then incorporate back into the main portion of your soap mix before it cools. If you are a little slow and it starts to set up, simply remelt together and incorporate well.
-
Clays are very powdery additives and should be added in the warmest soap, when it is at its most liquid. If you don’t disperse these properly, you will have dry pockets in the set soap. You can moisten these with Sodium Lactate Plus or even a little Isopropyl Alcohol prior to adding.
-
With Ground or Shredded Loofah and Jojoba beads these can be added directly to the soap and gently stirred to incorporate – add these just prior to pouring as the soap begins to cool.
-
With additives such as clays, pumice, clay beads etc these can fall to the bottom of the soap. The soap will need to be gently stirred until the soap is a little cooler (and thicker and more syrupy). This keeps the particles suspended. When the soap reaches this syrupy consistency, it is time to pour. If you leave it a little too long, gently remelt and repeat this process. You can also purchase Stephenson's Suspending Soap Base if you like a lot of heavy additive material in your bars.
Sweating
Our natural bases exhibit very little sweating in comparison to some soap bases, particularly those that have been melted by the supplier. However, this can occasionally occur if the base is overheated or the weather is particularly damp and wet (think tropical weather). When you see beads of moisture on glycerin soap, it is not actually “sweating”; the soap is absorbing moisture FROM the atmosphere. If your soap does “sweat” it is purely aesthetic, and you can simply wipe it away – it’s still fine to use. Glycerine is a humectant, which means it draws moisture to the skin. It is also 'hygroscopic' which means that it takes up and retains the moisture – particularly during humid or wet weather. This is why you should wrap your soap as soon as it has rested a while. The best ways to avoid sweating are:
-
Be careful not to over heat the base. The optimum melting temperature is 55 - 65°C depending on the variety. If you heat the soap above this; it will “sweat” badly and have a high degree of water loss, which affects its composition.
-
Wrap your glycerin soap bars within a day or so, particularly in humid or damp weather, as the soap attracts moisture and will appear to “sweat”. Avoid using cling film as this doesn’t age well with soap; try cello sheets, bags or wraps or shrink bags.
-
Store the unused/unmelted base in an airtight bag or container to avoid it absorbing moisture in between soaping sessions.

Alcohol
Isopropyl Alcohol is your Melt & Pour Soap glue and spot repair treatment! Spritzing with Isopropyl Alcohol will eliminate bubbles from the surface of the soap and don’t forget to spritz with alcohol before embedding or adding layers. We prefer to use alcohol, but Surgical Spirits work as well. Immediately after you pour the soap, you may see a few tiny bubbles on the surface, if you give the surface a quick spritz and they will instantly disappear. When layering or embedding other soap into the melted Melt & Pour Soap Base, spritz liberally with Isopropyl Alcohol and it will stick together and not fall apart during use.
Don’t inhale the fumes – they are quite unpleasant! However, the smell of the alcohol disappears very quickly and does not affect the fragrance of your soap bars.

Further information is on our Melt and Pour FAQ and see Soap Queen's Melt and Pour Video Tutorials too!