


Beginner Instructions for making Moisturisers at Home
These instructions introduce you to the concept of making your own economical, natural as possible, and safe skincare products.
We hope by keeping the instructions simple, like cooking recipes, but still containing enough detail or explanation, you will have the confidence to enjoy making your own first moisturiser!
Lotion making is not as difficult as you may think, and creating a balance of ingredients to suit your personal needs is the secret. If you want to continue and need a more extensive reference, we have our Making Your Own Moisturisers Book - 50 pages of info and 50 pages of formulas. This is the result of 20 years of research, trialling, experimenting and generally loving creating my own skin care.
Moisturisers are an emulsion of oils and water. Depending on what we put in them, they can do wonderful things for our skin. The beauty of making your own is that you have total control over what you include in them.
The same basic method applies to make all lotion, moisturiser and hair conditioners, so we will outline the basic steps
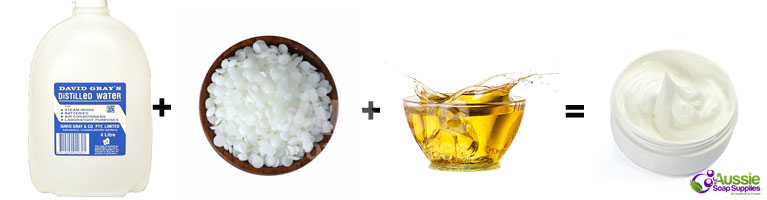
It is important when starting out, to identify which ingredients are "water" and which are "oil or wax". The "incidentals" like fragrance, anti-oxidants and preservatives set aside for later.
Equipment Required:
As ongoing cleanliness is MOST IMPORTANT, you would be wise to purchase economical, but new equipment, just for your cream and lotion making. Keep these in a bag or crate so that they are always clean and dust free, and ensure they don't get used for food preparation or soap making. This avoids cross-contamination and helps to keep things safe.
- Glass Thermometer
- Accurate kitchen scales - Preferably digital
- Disposable gloves
- Ceramic or Pyrex jugs and mixing bowls **
- Double boiler or Bain Marie (if you dont intend using a microwave)
- Spatulas and scrapers
- Very clean or sterile Cosmetic Jars/Tubes/Malibu Tubes
- Stainless shaft steel stick blender (not aluminium)
- pH Strips (not absolutely necessary, but very useful depending on preservative used)
- Isopropyl Alcohol (used for sanitising and cleaning benches/equipment)
**Use a jug or bowl large enough so that the fluids are approximately 1/3 the volume. This will allow room for remaining ingredients and will be deep enough so that when all the ingredients are combined there is sufficient space to blend without overflowing over the side. This also means any splatter won't be all over the place and the stick blender won't whizz the cream over the top of the rim).
Sanitising Equipment and Work Surfaces

There are several methods that can be used to sterilise including boiling, anti bacterial tablets, the dishwasher and bleach. However, we will briefly explain how to use Isopropyl Alcohol to clean equipment/surfaces. It is not a good steriliser for very dirty surfaces, but does quite a good antibacterial job on clean surfaces, especially if given a couple of minutes to work. This means that you should ensure that surfaces are cleaned initially by using your usual methods.
It's a good idea to keep a spritzer bottle handy, filled with isopropyl alcohol. Whenever you feel that something needs the extra "clean" boost, you can spritz it thoroughly. Let the alcohol sit for a minute or two, then wipe dry with a clean paper towel and dispose of the towel. Alternatively let the items/surface air dry. Thoroughly spritz clean jars, lids and, pumps, tubes and sprayers with alcohol and let air dry.
It's also a good idea to use a new roll of paper towels each time you make lotions, instead of reaching for the kitchen roll you already have in use. If you don't use all the towels, you can still use them for general household cleaning, but using a new roll each time you craft helps reduce the possibility of contamination.
Spritz other clean containers or utensils (bowls, spoons, etc) with the alcohol and let them sit for a minute or two, then wipe dry with clean paper towels. New containers and malibu's don't require sterilization, if they are dusty, dry wipe clean.
Okay, let's go!
Weigh and measure all ingredients - set aside fragrance, vitamins etc for adding later. Measure these into GLASS, not plastic beakers
Place all Water Phase fluids - i.e. water, aloe vera gel, glycerine, floral waters or herbal infusions required for the recipe into the largest size Pyrex or heat resistant measuring jug. Then heat in microwave until the temperature reaches 70 - 75°C. Use a thermometer so that you KNOW the temperature - it is really important with lotion making
Remove and cover to avoid the mixture cooling and steam evaporation
Add citric acid (if using to balance the pH for natural preservative usage) to the water phase and mix with mixing spoon for a few seconds until dissolved. Set this aside.
Place Oil Phase ingredients (i.e. oils, butters, oils, emulsifying wax into a 750ml - 1 litre Pyrex or heat proof measuring jug. Heat in microwave for approximately 2 minutes in bursts or until all the contents are melted and are 70 - 75°C. For smaller watt microwaves you may need to adjust time to melt sufficiently. Adjust in 10 second bursts at a time. Remove from microwave and check that all emulsifying wax pastilles have melted as they can be a little slower to melt than the butters. Use a thermometer so that you KNOW the temperature - it is really important
Now re-check the temperature of the water phase. If this has dropped below 70°C give it a quick blast in the microwave to bring the temperature back up again. Then pour contents of the Oil Phase into the Water Phase, mixing with the stick blender or electric beaters. (Some books will direct you to pour the water into the oil, but I have never had a problem combining phases this way, which is the method I was taught, and to me it seems more logical!) Blend for approximately 1 - 2 minutes. (Be sure to keep the mixer well under the surface). Now let the mixture rest a few minutes and then repeat intermittently during cool down.
It's important to keep an eye on the mixture and mix frequently. Lightly cover if there is the chance of dirt/particles blowing into the bowl as the cream cools. This is entirely dependant upon the size of the batch. Small batches will cool MUCH more quickly than large ones, and the weather is also a factor. What you are looking for is for the mixture to start cooling and thickening nicely. Keep checking and mixing to ensure the emulsion stays homogenous as it cools.

At this point the temperature should ideally be around 30 - 40°C. Scrape down the bowl and then give a quick mix and then add Essential Oils or Fragrance, preservative/s, Vitamin E (an antioxidant, NOT a preservative) and Rosemary Oleoresin Extract (an antioxidant) as per your recipe. Mix on low for a couple of minutes to make sure all are combined well.
Remove the beaters or stick blender, and scrape sides of bowl and stir thoroughly with a spatula.
Now you can either pot up the cream or lotion, or set it aside for a few hours and pot it up then. Go ahead and have a test, it's ready to use!
Clean equipment and store away properly.


If you have made a thicker cream, it will be a little more difficult to fill narrow necked containers such as malibus or bottles. You can use a ziplock bag (as pictured above) to make a piping bag for your cream. You'll find the full tutorial for filling narrow necked containers HERE, but basically the graphics here say it all! Make sure all containers are DRY and clean before you fill them. Leave the lids OFF the jars for several hours and then make sure the lotion or cream is completely cold. This avoids condensation forming on the inside of the lids and allowing water to contaminate the lotion

TIPS TO AVOID PROBLEMS:
Always check the temperatures of each phase - if they are too cool, the waxes will solidify, and not emulsify properly, and the cream will be gritty.
One of the biggest causes of failure when making moisturisers is a change in the emulsifying wax you are using. There are dozens on the market - we sell Emulsifying Wax NF and several others. By knowing the INCI of your ingredients GUARANTEES that each new batch of wax purchased is of the same quality and ingredients and that it meets the National Standard.
Preservatives: If there is water (ie Distilled Water, Herbal Infusions, Floral Water, Goats Milk, Juice etc) you need to use a preservative. We use a preservative to stop bugs (microbial attack, mould, yeast, fungi, bacteria) which attack the cream/lotion biologically. ANTIOXIDANTS DON'T STOP BUGS OR MOULD ! Most of the bacterial and microbial growth is already present before you can see any noticeable change in the cream. To make a SAFE cream, it should be preserved.
DON'T USE VOLUME MEASUREMENTS - Always weigh oils and water. There is such a wide variation in the specific gravity (which affects the volume of oils, waxes and butters), that using a volume measurement is not accurate and will result in some batches being ruined. If you always weigh all the ingredients, you will always have good results.
Label and date the containers and now enjoy your creation!
Cosmetic Jars and Tubs are HERE
Fixed Oils are HERE
Butters are HERE
Essential Oil Blends are HERE
Artisan Fragrances are HERE
You can purchase a Lotion Making Starter Pack with or without our Making Your Own Moisturisers Book.


